Editing Payments
of Saved Invoices
This chapter covers the necessary steps to modify the Payment Type of an
Invoice that has already been saved.
Changes to the Payment Area of an
Invoice can only be done at the Remote
station (store or warehouse) where the Invoice was originally made.
The changes made to the Invoice will then be synchronized out to the Main
station.
The Payment Type is not actually changed. Keeping with our philosophy
of control and our belief that all changes must leave an audit trail,
what you actually are doing is creating a second payment that cancels
out the first payment and a third payment with the correct amount and
Payment Type. If there are multiple Payment Types then the same procedure
must be repeated for each Payment Type that needs to be modified.
There are five steps that need to be followed to modify the Payment Type
or Tender Type of an Invoice.
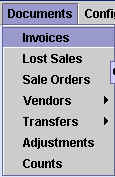
1) From the Main Menu, open the Documents>Invoices Catalog and find
the Invoice that you wish to modify.

2) Once you've found the Invoice you are looking for, click on the
Payment button  on the toolbar
at the top of the catalog. This will
allow you to add new Tender Types to the Invoice.
Pressing the Payment button will allow you to add new lines to the Payment
Area of an Invoice but it will not allow you to delete any existing
lines or edit an existing Tender Type. However, you can delete and edit
the new Tender Types if you make a mistake as you add them.
3) In the Payment Area, move the cursor to the Tender Type field and
scroll down to the next available empty line and click on the mouse button.
You will see the Payment Types menua appear. Select the same Tender Type
as the one you wish to modify. You will see the amount "0.00"
appear in the Net field. Move the cursor to the Net field and enter a
negative value for equal to the amount in the original Tender Type that
you are trying to modify.
In the example below, the original Invoice shows that the balance of $48.55
was paid by Cash. The user wishes to change the Tender Type to Credit
Card, so the user has added a new line to the Payment Area with a Tender
Type of Cash and the amount "-48.55" in the Net field:

If the Tender Type you are modifying is a credit card or check, a drop-down
menu with the Credit Card Catalog or the Banks Catalog will appear; be
sure to select the same credit card or bank that was used in the original
Tender Type.
4) Now add a new line to the Payment Area by selecting the desired
Tender Type and entering the correct amount, as shown below:

Note that you can only see two lines at a time in the Payment Area and
you may need to use the directional arrows at the right to scroll up and
down.
You could also modify only part of the total payment. For example, you
could enter a Cash Tender Type with a Net of "-30.00"
and then add a new Tender Type of Checks with a Net of "30.00".
This way the payment would be composed of two parts: $18.55 by Cash and
$30.00 by Check, where before it was made up of only one Tender Type.

5) When you are done adding Tender Types to the invoice, once again
press the Payment button  . This will signal to XpertMart™ that you are done editing the Invoice and no further
modifications can be made (unless you press the Payment button again).
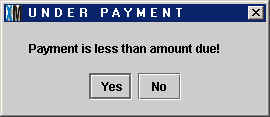
If one of the amounts you entered was incorrect and you have not accounted
for the full Amount Due on the Invoice, you will see the following error
message:

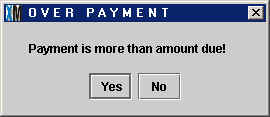
If, on the other hand, while editing Tender Types you have entered too
much payment, you will see this error:

If there is no problem with the amounts entered, then no message will appear
after you press the Payment button a second time and the modifications
to the Invoice will be saved. If you do not press the Payment button to
"close" your editing session, none of the changes to the Payment
Area will be saved.
The new lines in the Payment Area will be stamped with today's date, recorded
in the Audit Log and transmitted to the Main station during the next synchronization.
Copyright © 2002 XpertMart
* Return to Table of Contents*


